Setup an in-house server using Meteor Up
This page documents the process of setting up an in-house server for RadGrad based upon Meteor Up.
These instructions assume you have a physical machine running a recent release of Unix.
Setup "radgrad" account
To start, you will need to create the ability for multiple developers to manage a single RadGrad installation on this server. We recommend setting up an account called "radgrad" whose password is shared among developers with deploy permissions.
Open ports
Several ports on the server will need to be open:
| Port | Service |
|---|---|
| 22 | ssh |
| 443 | https |
| 80 | web |
| 19999 | NetData |
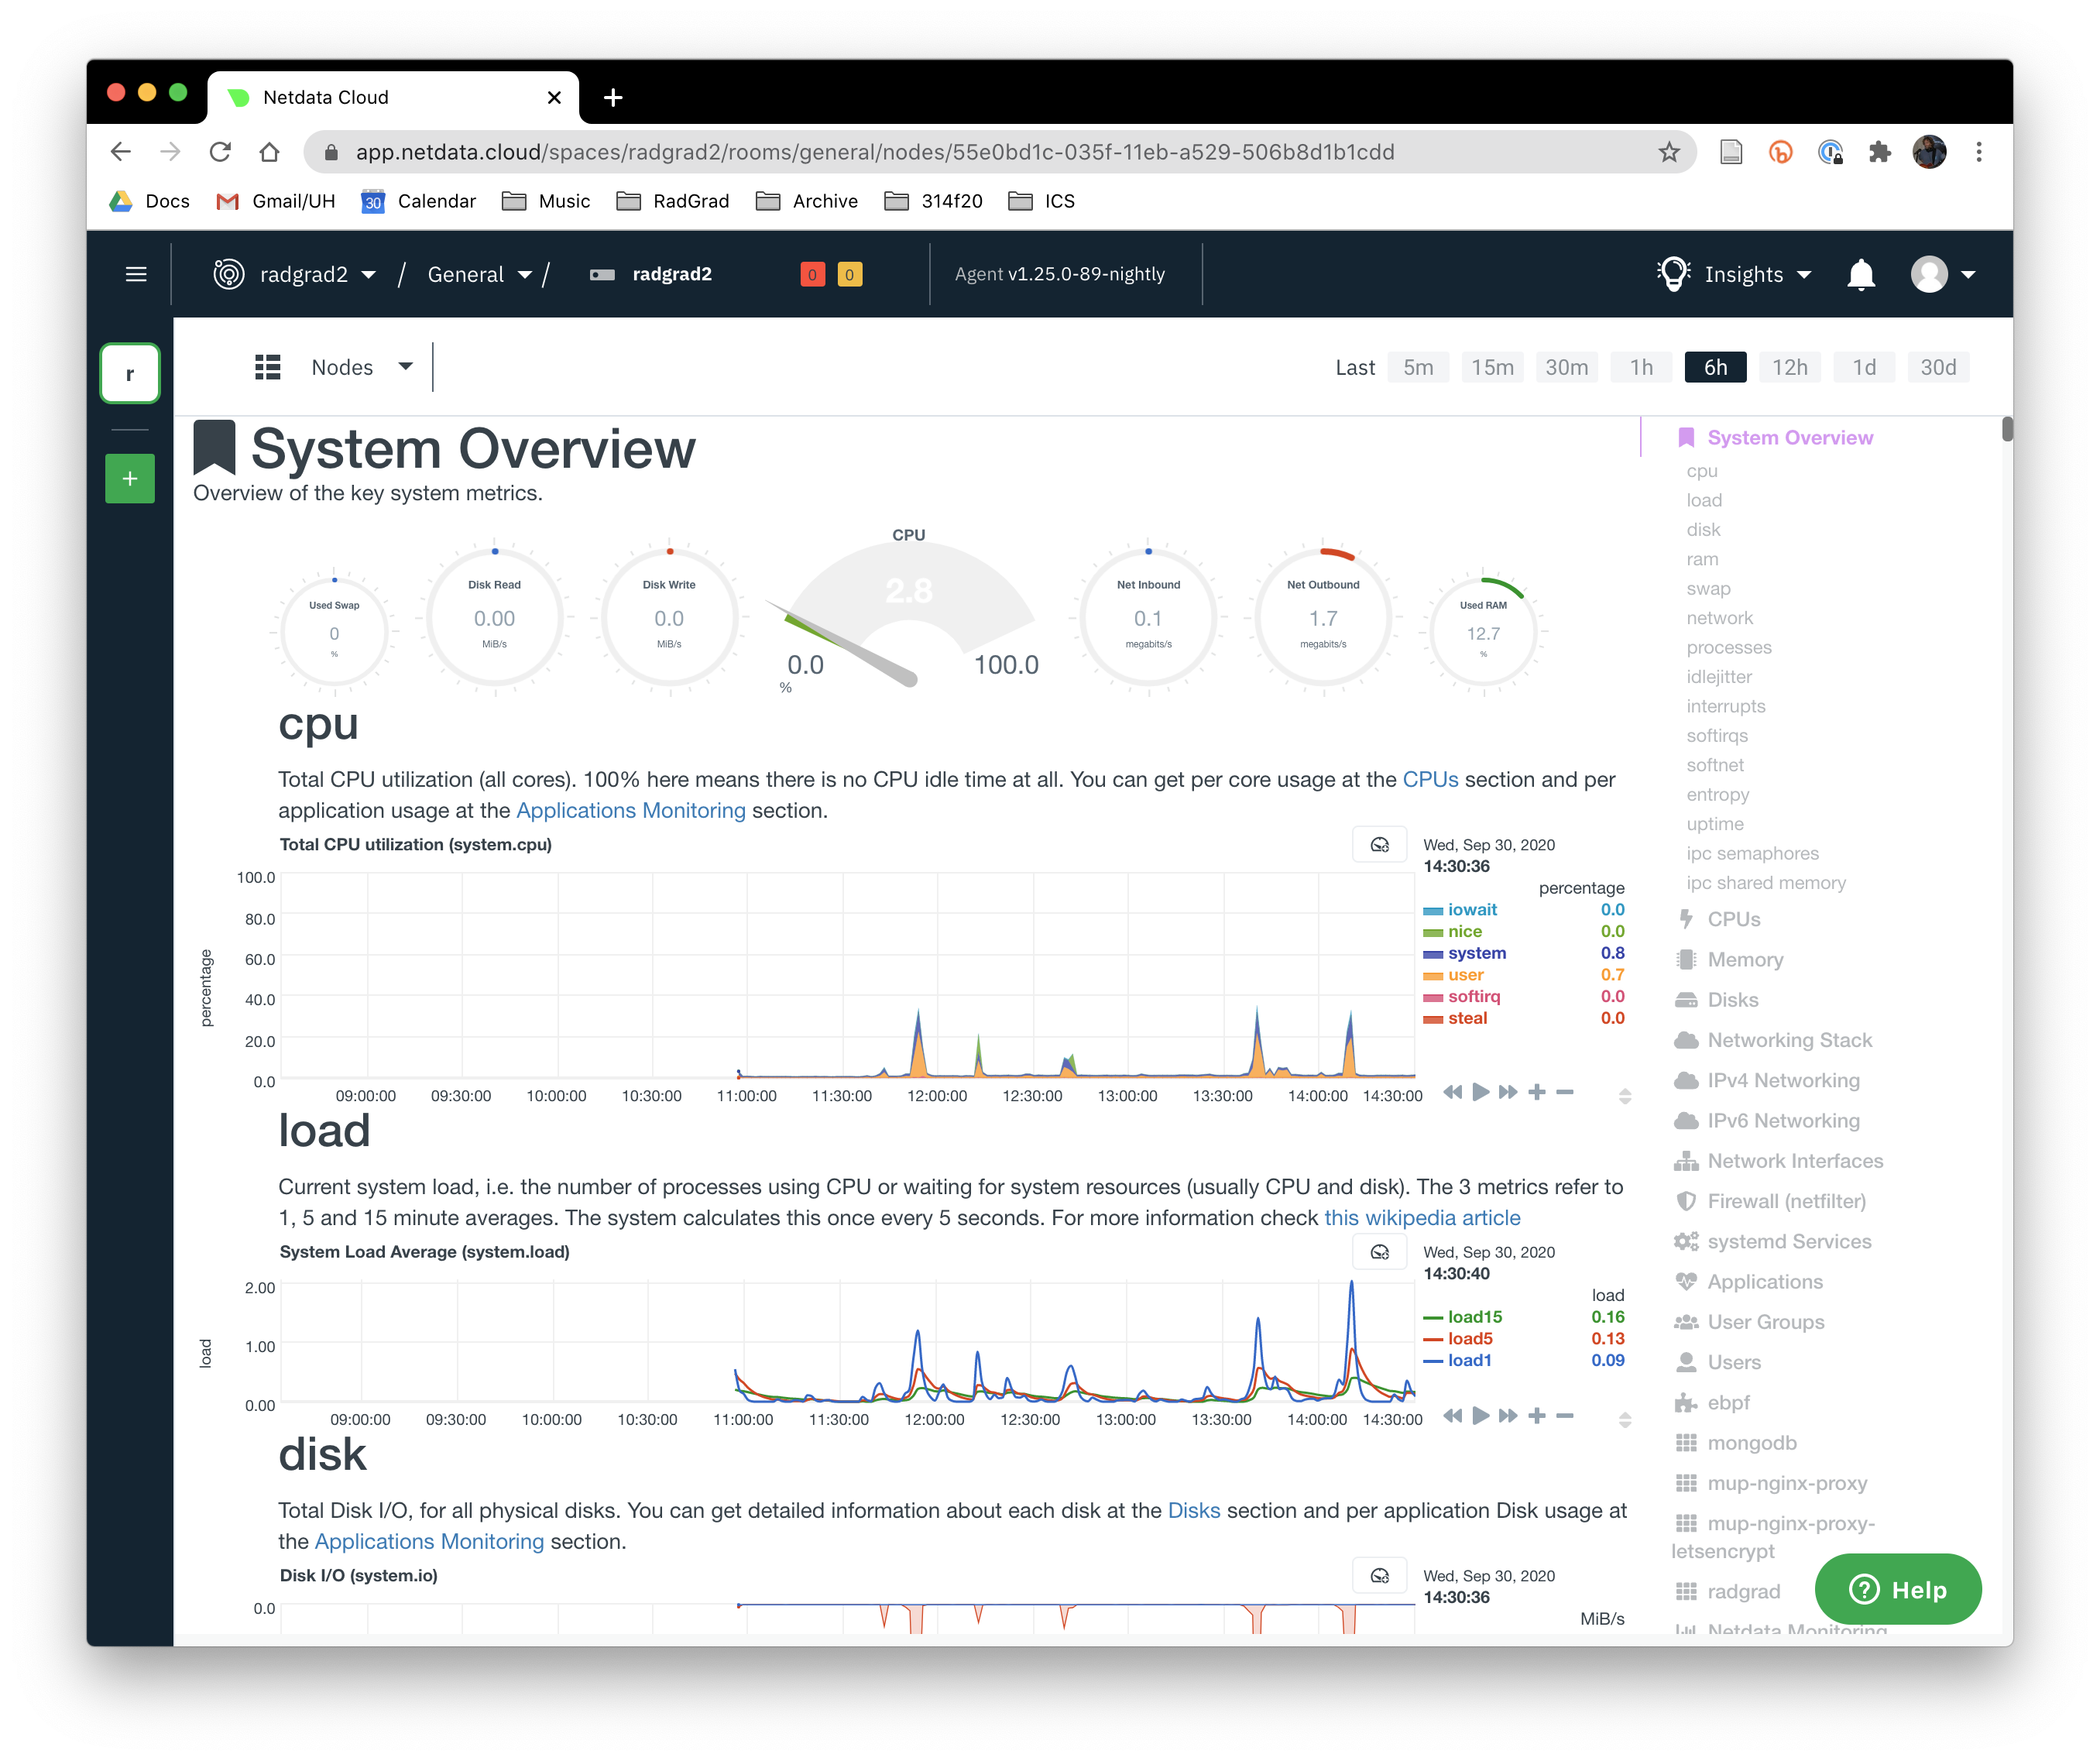
Setup NetData
It is useful to have system load monitoring established for the production server. One (free) choice is NetData.
Follow their instructions to set up a monitor daemon on the production server and "claim" that server in their cloud-based dashboard service. When you are done, you can easily monitor the load on your server and even set up alerts when various thresholds are crossed. Here's a screen shot illustrating the dashboard:
Add NOPASSWD
In order for the mup setup command to work, you must add NOPASSWD to the sudoers file on the server as documented in SSH based authentication with sudo.
Install mup
Follow the instructions at http://meteor-up.com/docs.html#installation:
Setup mup.js and settings.json
The app/.deploy directory, there are two template files: mup.sample.js and settings.sample.json.
Copy mup.sample.js to mup.js and settings.sample.js to settings.js:
Both mup.js and settings.json are ignored by git, so you can safely add credentials into those files without fear of them being committed to GitHub.
Edit these two files, adding credentials where necessary. See Philip if you need credentials.
Set up server
You can now set up the server following the directions at http://meteor-up.com/docs.html#setting-up-a-server:
Sample invocation and output:
Deploy to server
Now you can deploy the current version of RadGrad in your directory to the server following the directions at http://meteor-up.com/docs.html#deploying-an-app:
Sample invocation and output. This takes approximately 10 minutes on my machine to complete:
After deployment finishes, the app should be live at https://radgrad2.ics.hawaii.edu.
Check status of deployment through logs
To ensure that what you wanted to have happen actually happened, check the logs with mup logs:
Sample invocation and results:
Extremely Important Note: Each time you start up RadGrad and initialize it with a new database, a new admin password will be generated and the log file will be the only place it is made available. You must check the logs and save that password someplace safe, because it will be overwritten the next time you deploy an update.
Finish initial setup
See the next sections for additional setup instructions, including:
Publishing a new release
Once you have successfully set up your RadGrad server, subsequent updates to the system are much more simple.
See Publishing a new release for details.